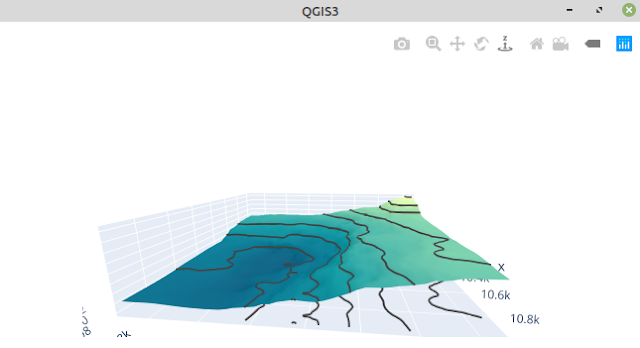
XYZto3D plugin is a plugin in QGIS that generates XYZ data into a 3D surface model as depicted in the figure 1. The objective of this post is to introduce the plugin, covering it's installation and how to use it. More over it will also explain how the plugin works, so this post will be a little documentation for this plugin.

|
| Figure 1. 3D Topography Surface from XYZ Data |
XYZto3D Plugin Installation
To install the XYZto3D plugin can be done using the following steps:
1. Download the plugin
XYZto3D.
2. From the top toolbar, select Plugins >> Manage and Install Plugins...
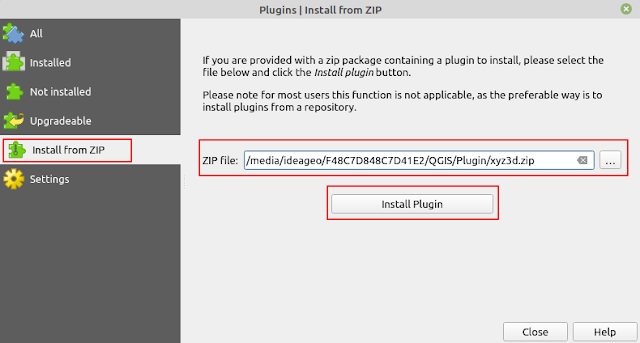
3. The Plugins window will appear as in figure 2. Select Install from ZIP. Then select the downloaded ZIP file and click Install Plugin.

|
|
Figure 2. XYZto3D Plugin Installation |
4. Because the installation is not from the official QGIS plugin repository, a warning window as shown in the figure 3 will appear. It's a good warning that make you aware to not install any untrusted plugin which can harm your computer. For that make sure you get the installation file from us geodose.com.

|
|
Figure 3. Security warning |
5. Click Yes to continue the plugin installation.
Running XYZto3D Plugin
After the installation, you will find the plugin on the top toolbar or in the Plugins menu as in the figure 4.

|
|
Figure 4. XYZtoPlugin in the Plugins Menu |
After selecting the plugin's icon, the XYZto3D plugin window will appear as depicted in the figure 5.

|
|
Figure 5. XYZto3D Plugin Window |
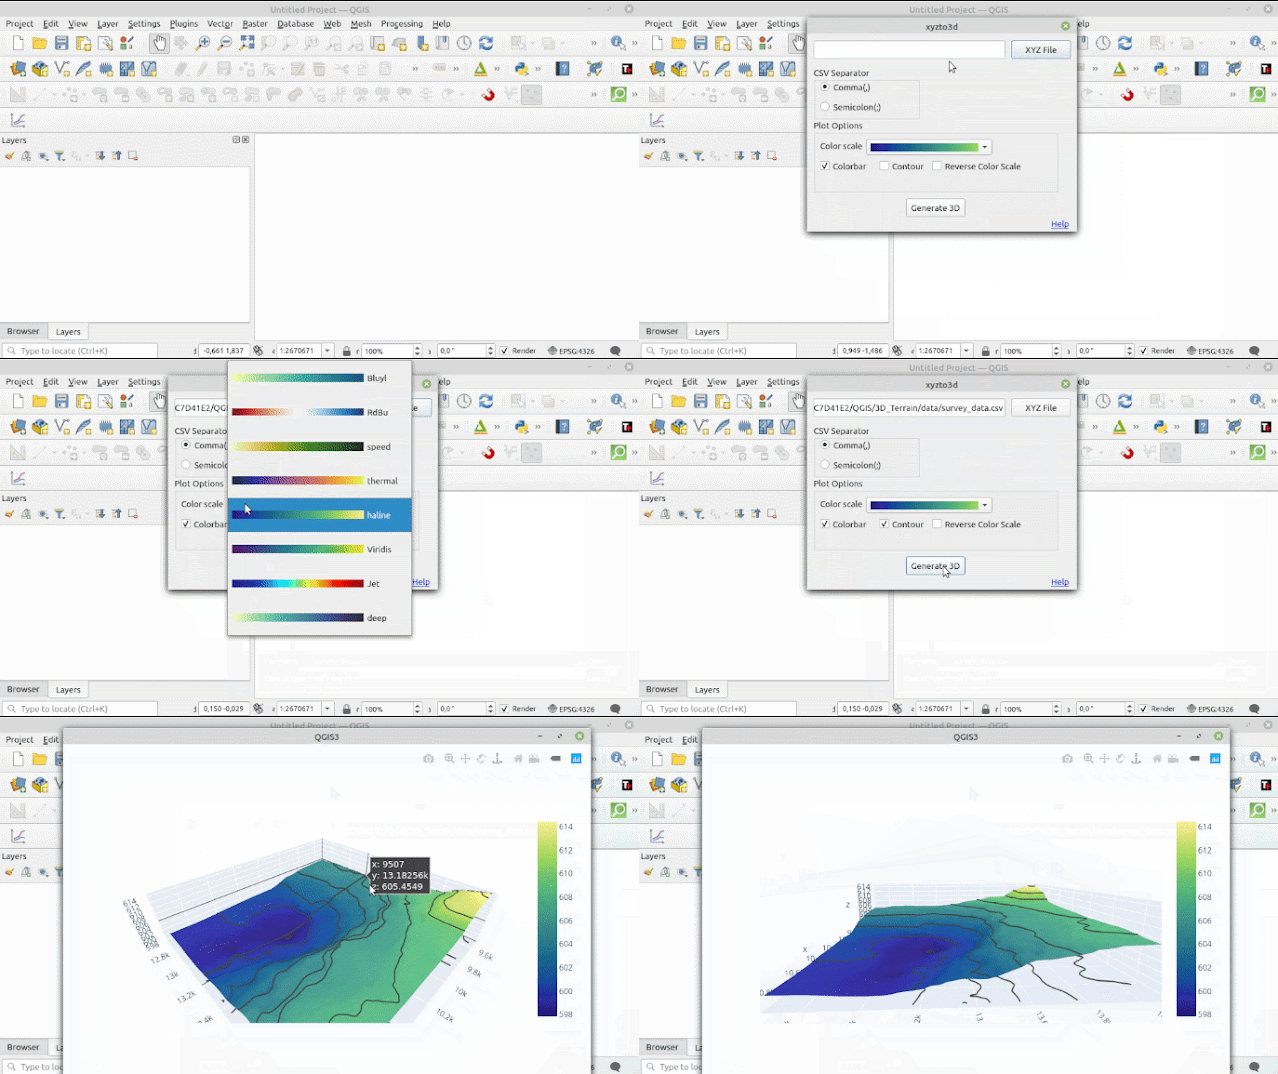
1. The input file to generate 3D topography surface using this plugin is a CSV file that consist of X, Y and Z columns. You can download a CSV sample file here.
2. Depends on your CSV file, you can select whether it use comma or semicolon for value separator.
3. The last one is plotting options. Here you can see some options to choose and can be included in the 3D plotting result such as color scale, colorbar, contour and there is also an option available to reverse color scale.
Refer to the figure below to see the plugin in action.

|
|
Figure 6. XYZto3D Plugin in Action |
How XYZto3D Plugin Works
The XYZto3D works by interpolating the input height(Z value) for a number of unmeasured locations. Figure 7 gives the illustration the location of interpolation points around measured points.

|
|
Figure 7. Measured and interpolation points |
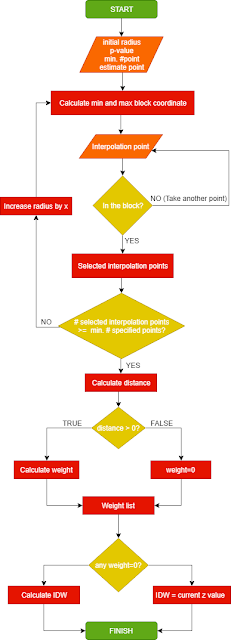
 The interpolation method that implemented in this plugin is Inverse Distance
Weight. The flowchart in the next figure (click to enlarge) shows the step by
step approach how the IDW algorithm is implemented to interpolate the height
at a unmeasured location/estimate point. From the flowchart can be observe
that the algorithm require four input variables: initial radius, Power
(P-value), number of known points which involve in the interpolation process
and a point to estimate. In the implementation the value of Power (P-value)
was defined 2 with minimum 5 known point. If the known point less than 5, it
will increase the radius by x meter until the number of known reach 5.
Therefore the input data must be in a projected coordinate system.
Further explanation about this flowchart can be found at this post: Creating IDW Interpolation from Scratch in Python
After interpolating all unmeasured/unknown points, the result will be plotted using Plotly to view 3D topography surface model as in figure 1. The output of 3D model is render in a HTML file which will open immediately after the process finish. To learn more about how to plot a surface model in Python please check out this one 3D Terrain Modelling in Python.
That's all the introduction about XYZto3D plugin that is used to generate 3D topography surface model from XYZ dataset. This is an experimental plugin, so there is always a room to improve it. Overall I hope this plugin useful. Thank you.
