Inset map is a smaller map in a frame of a main map to help users get a reference to the surrounding area or bigger extent which is called overview map. An inset map also can be used to show more detailed features of an area in a main map as illustrated in figure 1.
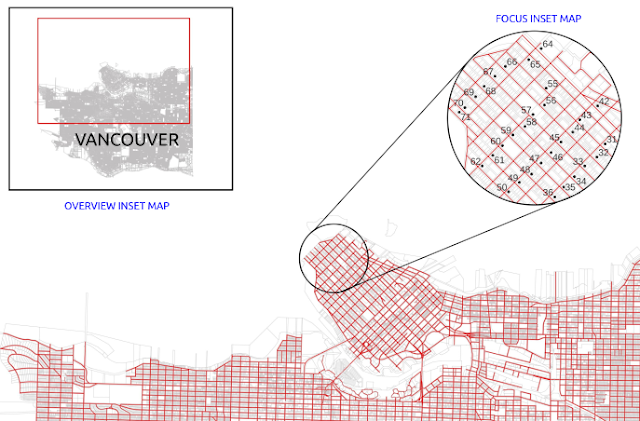 |
Figure 1. Main map, overview and focus inset map
|
Commonly the shape of a main map is in a rectangular shape. How to make it circular or any other shapes?. This tutorial will discuss it. Let's go!
First step: Prepare two map frames in a layout as a main map and a smaller one as an inset map as shown in figure 2.
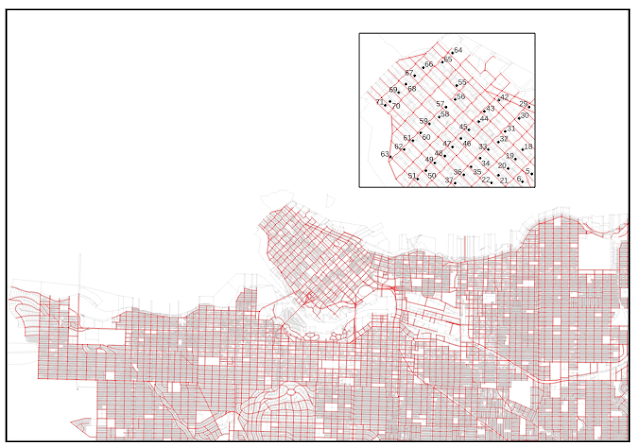 |
Figure 2. Main map with a small inset map
|
Using the Add Shape tool, draw an ellipse/circle to the layout. If you want to draw a perfect circle, while drawing, push the shift key. Then place the circle over the inset map as shown in figure 3.
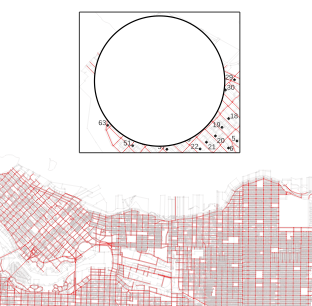 |
Figure 3. Circle over inset map
|
Select inset map frame and in the
Item Properties select
Clipping Settings tool as shown in the figure 4.
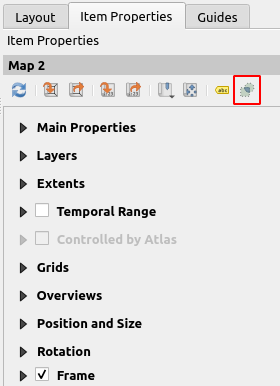 |
Figure 4. Clipping settings tool
|
In the Clipping settings window as in figure 5. Check the Clip to item option and select the shape. The inset map's frame now should be clipped into the circular shape as in the figure 1.
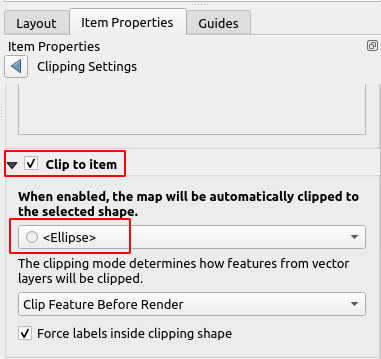 |
Figure 5. Clipping settings window
|
To change the shape, it could be done by changing the shape to predefined shapes (Triangle, Rectangle or Ellipse) from the shape's properties. Moreover if you want other shapes, you can draw a polygon using Add Node Item > Add Polygon tool as in figure 6.
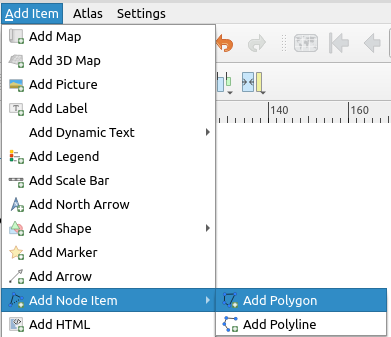 |
Figure 6. Add Polygon tool
|
Figure 7 shows inset map in ellipse, circular and polygon shape.
 |
Figure 7. Inset map in triangle, ellipse/circular and any polygon shape
|
That's all the tutorial on how to create various shapes of inset maps like circular, triangle and any polygon shape. With this capability, it gives more freedom in designing a nice and beautiful map in QGIS. Thanks for reading! For other interesting QGIS tips and tricks please visit
QGIS Tips and Tricks series.
QGIS
Tips


