Open ESRI Geodatabase with QGIS Browser
There are three ways that can be done to open a geodatabase file in QGIS. We
start with the first one using QGIS Browser. Like a browser in Linux,
Windows or any operating system, it shows all data in a path, folder or
directory. The same with the QGIS browser we use it to look at what's in
there in a path, with some additional capabilities to support geospatial
data like adding data directly to QGIS map or project, exporting data,
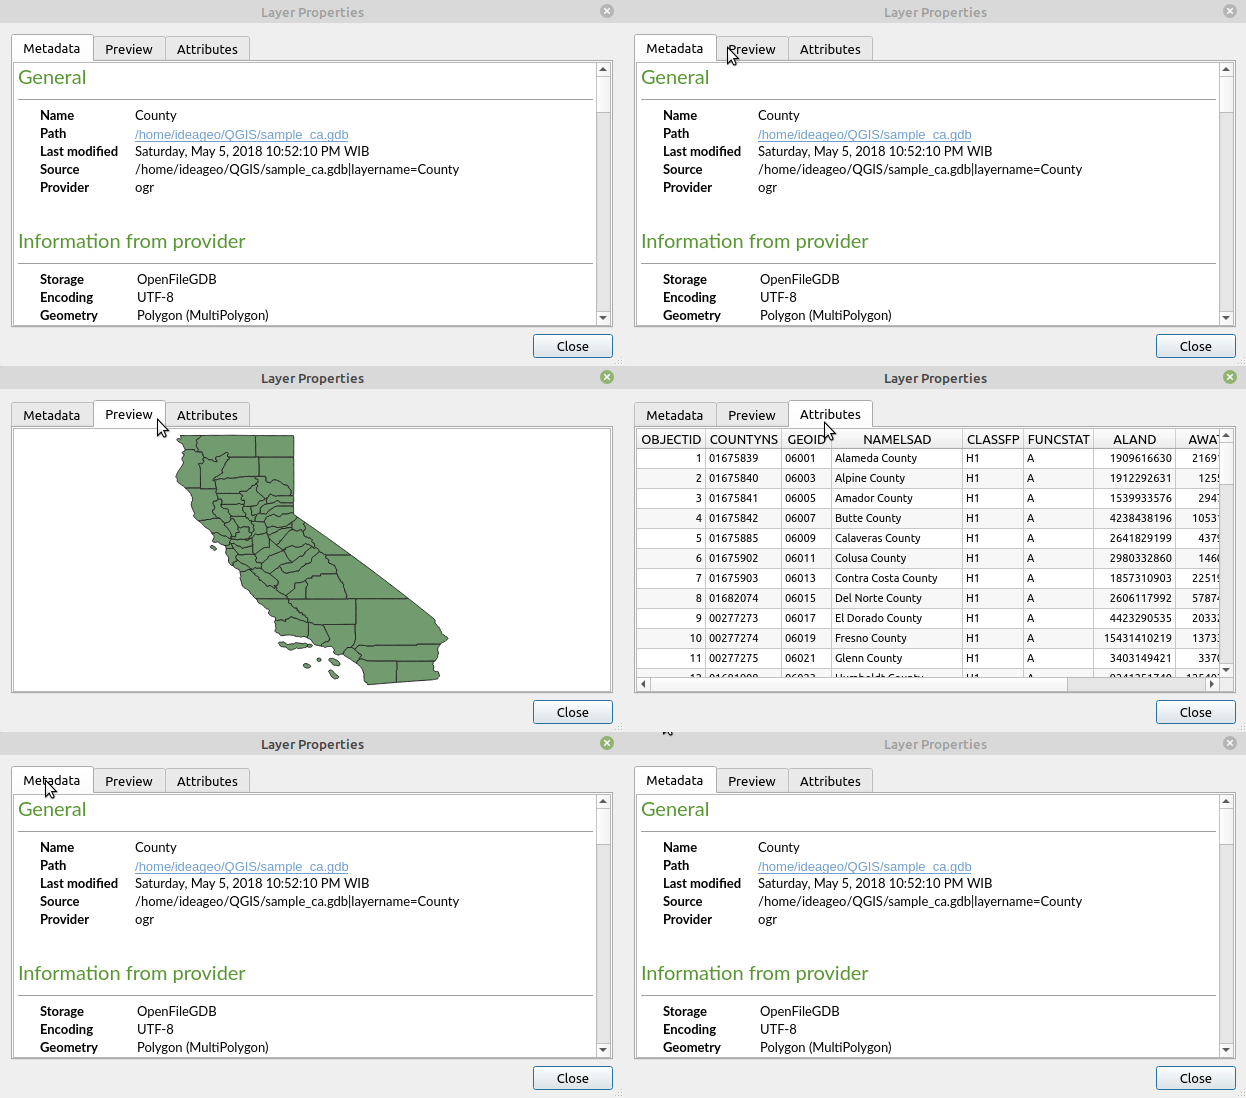
checking file properties which include metadata, attributes and data
preview.
Let's do it. Open your QGIS, look at the
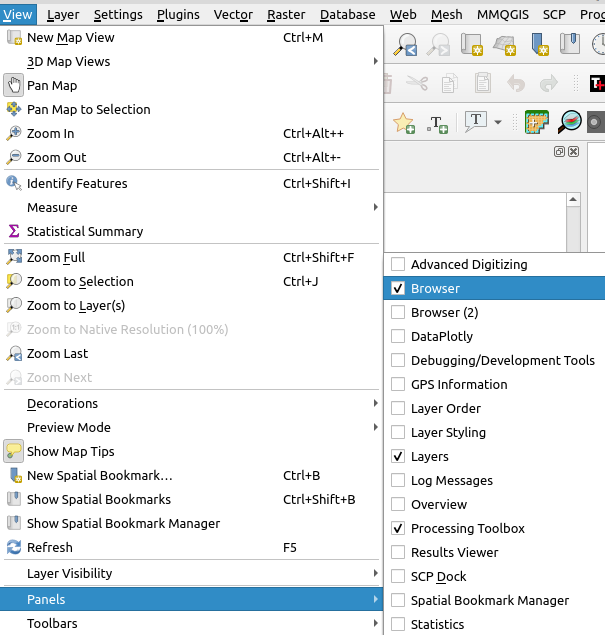
Browser next to the layer panel. If it doesn't appear in your QGIS go
to View, Panels and check Browser as shown in figure 1.

|
||
| Figure 1. Show Browser Panel in QGIS |
In the browser panel, browse to the ESRI geodatabase file. In this tutorial
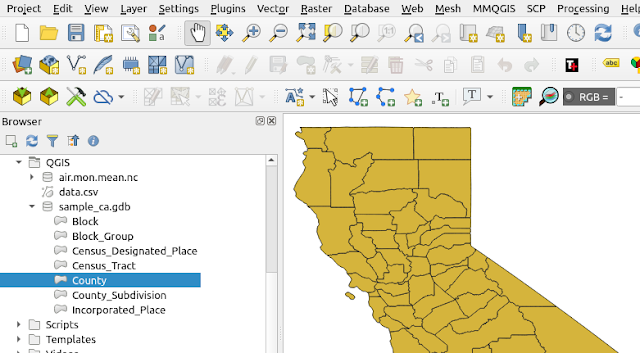
I use a geodatabase which is called sample_ca.gdb. In the figure 2,
all the files in the geodatabase can be seen.

|
|
Figure 2. Files in Geodatabase |

|
|
Figure 3. Layer Properties Window |
To add a data in the geodatabase into a QGIS map, right click a file to be
added and select Add Layer to Project or simply double click the
file. The selected file will be added to the QGIS map canvas as seen in
figure 4.

|
|
Figure 4. Geodatabase Data in QGIS |
Open Geodatabase with Data Source Manager
The second way to open an ESRI geodatabase in QGIS is using Data Source
Manager. From the Layer menu select Data Source Manager. The
data source manager window will appear as in figure 5. On the left panel,
select Vector. In the right panel the options for vector data will
appear. In the Source Type select Directory. Then select
OpenFileGDB and in the Vector Dataset(s) browse to the
geodatabase.

|
|
Figure 5. QGIS Data Source Manager |
After pushing the Add button, the data items to select will appear in a
window as in figure 6. In the window we can select all files to be added into
QGIS or select some files using the Ctrl keyboard button.

|
|
Figure 6. Select Geodatabase Items to QGIS |
Drag and Drop
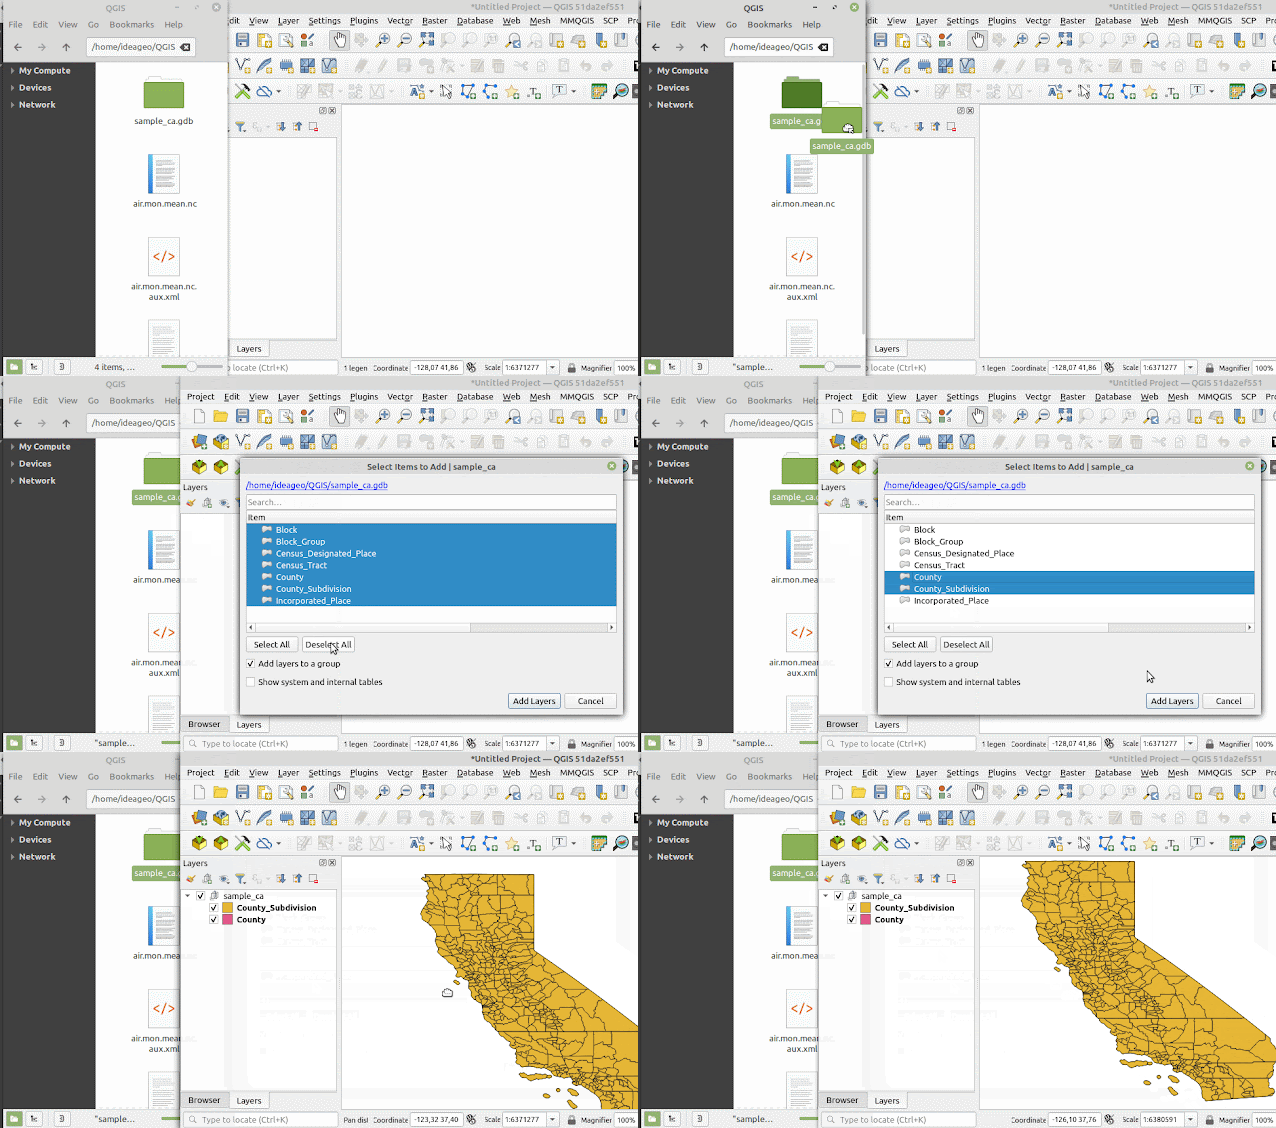
The last method to open or add ESRI Geodatabase data into QGIS is by drag and
drop. Open the browser file window in your machine and select a geodatabase.
Drag it into the QGIS layer panel. When the + icon appears over the layer
panel, drop it. The select items windows will appear again as in figure 6.
Figure 7 shows steps in this method.

|
|
Figure 7. Add Geodatabase File with Drag and Drop Method |
That's all this tutorial on how to open files in ESRI Geodatabase into QGIS. We already discussed three methods on how to perform the tasks, started with using the QGIS browser, add data from the Data Source Manager and the drag and drop method. From now I hope you don't worry anymore if you can't access the file in ESRI geodatabase when the license is expired and you can't afford to purchase a new one. Or maybe you want to switch to QGIS :).
Anyway in another tutorial I wrote on how to access data from ArcGIS REST API in QGIS. Check it out if you're interested. Thanks!
